I hope you’re doing well. Thanks for taking a moment to read this month’s update. To signup to receive monthly notifications from me, please click here.
APPLE CARD
It’s likely you’ve not heard about Apple’s new credit card yet. It’s not had as much publicity as their computers, and the card itself isn’t yet fully available to the public. Apple began sending out a limited number of early invitations for the card on August 6 and I received an invitation on August 8. I presume these invitations will continue to trickle out over the next two weeks until the official launch.
I wrote an article about the Apple Card and some problems people were having during this soft launch. The article has had a relatively small number of readers — about 160 people mostly from the U.S. who have specifically searched on an error message to find my article which was published quietly. Nobody else will likely see the article unless they search on that error.
I believe there are multiple problems with the Apple Card launch process which make it a very valuable learning experience for anyone considering launching a new product or service.
If you’d like an inside look at the product launch process and some of the issues encountered feel free to read the article. [More…]
TRANSPORTATION
In my newsletter last month, I shared about my upgrade in transportation. I’ve been riding an electric bicycle much of the time that gets the equivalent of about 1,300 miles per gallon equivalent. In other words, for what you might spend on a gallon of gas, for the same amount of money in electricity, I can go about 1,300 miles. When I’m not on the bicycle, I’ve been driving a Subaru Ascent with semi-autonomous driving. That’s really been helping reduce driving fatigue for all the consulting related traveling I’m doing. The combination of the two modes of transportation has been a great improvement.
WASTE AUDIT
While at the University of Iowa, I was on the Green Team for the departments I worked with. In case you’ve not heard the term before, a Green Team is a group focused on sustainability efforts for an organization or business unit.
During that time we conducted a waste audit which involves going through entire dumpsters of garbage and separated the waste into categories. Then an assessment was made regarding how much of the waste being sent to landfill could have been recycled or composted. From the audit we could measure how much we were recycling of our total waste stream.
This month I decided to start my own in-home waste audit which focuses on actionable data to reduce our contribution to landfill. We already recycle all our glass, paper, plastic, cardboard, and metal, and we live in a partially solar powered complex. But I’d like to do more. To get a baseline to measure progress, I’m using a simple luggage scale to monitor how many pounds of garbage we dispose of that goes to landfill. The strap from the luggage scale can quickly measure the kitchen trash bag as I lift it. I enter that data into a spreadsheet along with the weight and volume of materials we’re recycling, and the weight of compost. This way, I can calculate how many pounds of garbage we produce in a month, and begin to measure success at reducing that. It’s a very quick and easy collection of valuable data that just takes a second when you’re taking out the trash.
A simple set of goals might be to increase our recyclable materials and biodegradable food compost. Right? Well, actually, no.
I’d like to see us reduce our recycling and compost.
Compost is a great thing. It’s better than putting food in landfills. But not having food waste is even better. I try to prepare meals with the goal of reducing food waste.
From my perspective having an increase in recyclable materials simply reflects that we’re not shopping in the bulk isle at the grocery store with reusable containers. We’re buying products packaged in containers that, even if they can be recycled, are very costly to repurpose. So, I want to slowly phase-in reusable containers and bulk items. Today I noticed that our natural food store (the New Pioneer Co-op) has a bulk foods frozen section. This makes it possible to buy frozen foods in reusable containers. In the photo below you can see that these bulk frozen items are pre-made meals which even further reduces container and packaging waste.
WELLNESS
I’ve been sticking to a low-carb, low-sugar, high protein diet with lots of leafy green veggies — and that seems to be producing good results. I’m also continuing with a home workout program that includes yoga, meditation, strength training, and walking.
THANKS!
Many thanks to all of you who keep in touch and provide support for the work I do.
Want More News? For additional news and updates, you can click here to subscribe to the Resources For Life Newsletter.
Origins. For those of you who are new to these monthly personal updates, they began about 19 years ago out of a desire to share from my personal life about topics of lifeways (faith), health, career, finances, relationships, effective living, and activism. This is based on the life map presented on the Resources For Life website.
I hope you’re doing well. Thanks for taking a moment to read this month’s update. To signup to receive monthly notifications from me, please click here.
TRANSPORTATION
This month there has been a big change to my transportation situation. I’ll begin with some context.
One of my favorite vehicles to own was a 1993 Geo Metro that could get over 40MPG due to its small size and 3 cylinder engine. The Geo Metro replaced a very large, very heavy, 8-cylinder powered car that was getting 12 miles per gallon. So, what I saved in gas every month more than paid for the Geo Metro. It was easy to park, fun to drive, and surprisingly roomy. After putting over 220,000 miles on that car, I eventually retired it to a junkyard and began riding my bicycle full-time — a task made easier by having a short and predictable daily commute over about 15 years.
For many years, I didn’t own a car. I would rent a car when needed for longer road trips, take a taxi, or use public transit, but most of the time, I’d ride my bike. After some years went by, I began driving a leased Toyota Corolla, then a Honda CRV, and in 2016 started driving a Subaru Forester.
In the past few years of doing full-time consulting, I had intentionally been limiting my work to people and businesses that were easy to reach on a bicycle. I also was trying not to take on projects that required filling up a car with heavy equipment. People would deliver computers to my home instead. It was possible to run the business 90% by bicycle, but I was limiting my work quite a bit. I was reducing my own carbon footprint, but that was mostly just shifting the driving and carbon output to others.
In 2018, I realized that being on the bike so much can result in some health problems such as skin cancer, cataracts, and possible bicycle accidents. I also realized that using the car when practical could allow me to take on more work and serve more people. So, I began using the car more.
While the bike had its potential negative effects on health, so did the car. Driving so much was making me more sedentary. I began to notice some stiffness, and even ankle soreness from so much back and forth between the brake and accelerator – which is common with in-town driving.
For the past few years, I’ve been driving a 2016 Subaru Forester. It’s a very small SUV-style vehicle that’s a little taller than its station-wagon inspired sibling, the Subaru Outback. The Forester was great for hauling computers and its small size allowed it to have impressive fuel efficiency for an all-wheel-drive vehicle. However, with more daily driving, I was finding the legroom to be a bit cramped, and the road noise would make it hard to dictate or hear on the phone sometimes. I was hoping for something a little larger. Last year, Subaru started making a slightly larger Forester-like vehicle called the Ascent. The entry model is roughly the same cost as a higher Forester trim package.
In addition to being very quiet, and having more legroom, the Ascent has some additional features that reduce driving fatigue, especially the ankle fatigue from the repetitive stress of braking and accelerating. There’s a brake-hold feature, so the brake will stay held on once you stop at a light even without your foot on the brake. That’s a big help. Also, in-town and on the highway, the automated driving assistance features are very helpful. The car can accelerate, stop, and resume to a normal speed without use of the accelerator or brake pedal. There’s a learning curve to having some of the driving tasks handled by artificial intelligence. It’s like sharing the driving with someone who has their feet on the brake and accelerator while you have your hands on the steering wheel. It’s not quite like fully autonomous driving, but there’s definitely less fatigue. In just the first few days of driving the car I’m noticing that all the driving fatigue and signs of repetitive stress are gone. I’ll probably create a video and write an article about the Ascent to share more about its other features.
You might think the Ascent is the big transportation news from this month, but there’s more. I’ve been riding the same bike for many years – a heavy slow bike that emphasizes comfort and posture over pedaling efficiency. I’ve enjoyed that bike, but it was more exhausting to ride than a lighter more efficient bike. As a result, it was less practical to ride longer distances. On days when I had a lot of client work to do, I would just drive instead of riding the bike.
About two weeks ago, I purchased an electric bike that is really quite amazing. With the electric motor assisting, it’s possible to keep up with traffic on most in-town streets – so drivers are not suddenly coming up upon you. It’s those sudden surprises that distracted drivers aren’t prepared for, but when you’re riding with the flow of traffic, drivers have more time to see you and respond as needed. The extra boost of having a plug-in electric bike means that it’s possible to say yes to biking more often, even when errands and work take you farther away. It’s not a problem on an electric bike. So, now I’m running more errands and doing more consulting work on the bike, in less time. That’s less time in the heat and sunlight. I can arrive where I’m going without breaking too much of a sweat. Because it’s a bicycle, I can still take bike trails which are usually more direct than driving routes around town. Most destinations are reachable in less time on the bike than they are by car. With bike lanes to avoid traffic and more convenient parking for bicycles, the bike is really an appealing choice.
Riding the electric bike feels like riding a very expensive lightweight racing bike with biking shoes clipped to the pedals and narrow tires with 110 pounds of air pressure. All the expense to make a bike lighter, the discomfort of leaning over to reduce wind resistance, and the slick spandex biking clothing are not needed. The electric motor makes the 50-pound bicycle feel like a 15-pound bicycle. It makes hills feel like they aren’t so steep. It’s like everywhere you ride you have a 30 mile per hour tailwind.
The combination of a more comfortable car, and faster bicycle, has really made a huge difference for my biking and driving experience. I’ll be able to better enjoy my driving while needing the car less now that I have a speedy bike.
WELLNESS
My improvised home workout is going well. I’ve been able to recreate the gym membership experience at home using tension bands and a few inexpensive free weights. Before strength training, I’m still starting the day with yoga, meditation, and then a morning walk/run that lasts about 20 minutes.
I’m maintaining a low-carb, low-sugar, high-protein diet with incremental fasting. I don’t have any fixed targets for intake, but generally, I’m consuming 20 grams of carbs per meal, 5 grams of sugar per meal, and 50 to 70 grams of protein per day. So, nothing too extreme. My sugar intake occasionally is higher if I have fruit. I count all forms of sugar and equivalents, not just refined sugar. To keep my carb intake low, I avoid bread, rice, pasta, beans, potatoes, chips, and other non-essentials that are high in carbs. This is a flexible diet that’s easy for me to stick to. As of this month, I’ve reached my lowest body weight in more than 6 years. The weight loss is slow and gradual, which is a good thing for long-term success.
THANKS!
Many thanks to all of you who keep in touch and provide support for the work I do.
Want More News? For additional news and updates, you can click here to subscribe to the Resources For Life Newsletter.
Origins. For those of you who are new to these monthly personal updates, they began about 19 years ago out of a desire to share from my personal life about topics of lifeways (faith), health, career, finances, relationships, effective living, and activism. This is based on the life map presented on the Resources For Life website.
I hope you’re doing well. Thanks for taking a moment to read this month’s update. To signup to receive monthly notifications from me, please click here.
WELLNESS
This past month I developed a strength training program that I can do at home with a few dumbbells, kettlebells, and exercise bands. Using these inexpensive items, I’ve been saving time and won’t need to pay for gym membership. I feel like my workout is better and its nice having the ability to take my workout on the road when traveling. In addition to the strength training program, I have also been walking instead of using an elliptical machine. I’ve been seeing better results that from my workouts at the gym.
Over the past two weeks I’ve been cutting back on my carbohydrate intake, so no rice, beans, bread, pasta, or sweets. I’ve written about this in the past, but only recently have a renewed interest in this eating plan. I’ve also started tracking my water intake with a goal of 64 ounces per day.
RESOURCES FOR LIFE
I made a slight redesign to the Resources for Life website. The logo is centered at the top of the page and the menu is centered underneath. For the mobile view of the site, there’s a drop-down menu.
TECH WRITINGS
I’ve written some tech tip guides this past month. You can find them along with some other writings on the Resources for Life news page.
THANKS!
Many thanks to all of you who keep in touch and provide support for the work I do.
Want More News? For additional news and updates, you can click here to subscribe to the Resources For Life Newsletter.
Origins. For those of you who are new to these monthly personal updates, they began about 19 years ago out of a desire to share from my personal life about topics of lifeways (faith), health, career, finances, relationships, effective living, and activism. This is based on the life map presented on the Resources For Life website.
I hope you’re doing well. Thanks for taking a moment to read this month’s update. To signup to receive monthly notifications from me, please click here.
Wellness
This month I adjusted my workout routine. In the past, I was lifting about 13,000 pounds every morning for a cumulative of over 250,000 pounds per month. Now I’m lifting only 8,940 pounds each workout and only going a few days a week — sometimes skipping three to four days for rest in between workouts.
By exercising two or three days and then resting two or three days, I am able to have several days of recovery time. According to my body analysis scale, this process helps increase muscle mass by avoiding ongoing muscle breakdown.
Another aspect of having a more flexible and casual workout routine is that I can place a higher priority on sleep and if there’s a morning when I’m short on sleep, instead of waking at 5M to get to the gym early, I can sleep in a bit and make sure I’m fully rested.
As far as wellness metrics and outcomes, sleep seems to be more critical than exercise if given a choice.
Thanks!
Many thanks to all of you who keep in touch and provide support for the work I do.
Want More News? For additional news and updates, you can click here to subscribe to the Resources For Life Newsletter.
Origins. For those of you who are new to these monthly personal updates, they began about 19 years ago out of a desire to share from my personal life about topics of lifeways (faith), health, career, finances, relationships, effective living, and activism. This is based on the life map presented on the Resources For Life website.
I hope you’re doing well. Thanks for taking a moment to read this month’s update. To signup to receive monthly notifications from me, please click here.
New Office Furniture
For most of my life, I’ve been using cardboard bankers boxes to store and organize my stuff with plastic shelves to stack them on. My ‘desk’ has been one of those tables with folding legs you see used at church potlucks. This has partly been motivated by the feeling of having ‘beat the system’ by functioning on a shoestring budget. However, my office can appear to be cluttered and not as efficient as possible.
As I produce more videos for YouTube, I’ve wanted to create a ‘studio office’ that doubles as a recording studio as well as work space. So, this past month I upgraded the office with solid wood custom Amish-built furniture that fits the space and my needs perfectly. This way I can document the work I’m doing in an attractive non-cluttered environment. If you’ll go to my YouTube channel, you can see the cabinets behind me in the most recent five videos. In the weeks ahead, I hope to create a ‘my studio’ video, which is a common genre of video showing the furniture and tech gear used for producing videos, music, or other content. [see examples] You’ll get a closer look at what my setup looks like.
Monthly Emails
I’ve been using Yahoo Groups for about 20 years as a system for sending out monthly newsletters. It’s worked okay in the past, but recently their system hasn’t been consistently functioning properly. So, in 2019 I’m switching all my mailings over to Mail Chimp. To signup to receive my monthly email, please click here.
The monthly emails are important because they offer a less intensive subscription for people who don’t want to receive updates every time I post something to my website. One email a month is more manageable for most people.
Thanks!
Many thanks to all of you who keep in touch and provide support for the work I do.
Want More News? For additional news and updates, you can click here to subscribe to the Resources For Life Newsletter.
Origins. For those of you who are new to these monthly personal updates, they began about 19 years ago out of a desire to share from my personal life about topics of lifeways (faith), health, career, finances, relationships, effective living, and activism. This is based on the life map presented on the Resources For Life website.
I hope you’re doing well. Thanks for taking a moment to read this month’s update. To signup to receive monthly notifications from me, please click here.
INDIA
This month I spent about a week in India. The trip lasted from March 14-25 with about four days total of airline travel over and back, and some days after returning to adjust to Iowa time again.
Flight Plan. Our original planned flight path would have taken us over Iraq, Iran, Afghanistan, and Pakistan but as we approached these various military hotspots and no-fly-zones the flight path changed to avoid those countries entirely. It was interesting watching the rerouting in realtime on the seat-back display.
Global WiFi. My primary phone is an iPhone using AT&T. My secondary phone is a Moto X4 using Google Fi global connectivity. It was my first experience traveling around the world with virtually unlimited calling, text, and high-speed internet access. The Moto X4 is about $200 on Amazon and the Google Fi service starts at $20 a month. [Learn More] I’d been enjoying the Google Fi network in the U.S. to get phone and internet service where other providers have none. It was nice to use it internationally, and actually quite amazing to land in another country and have seamless inexpensive phone and internet service.
Infrastructure. I visited India about 7 times between 2008 to 2012 and was surprised to see back then how far advanced the country is beyond the United States in the areas of life that matter. On this most recent visit, I was astonished to observe the progress that transpired over 7 years since my last visit to Lucknow, India. This time I saw newly surfaced roads without potholes. Taxis running on clean solar power. New public transit metro subway train systems. Mesh network phone and data with seemingly no signal outages. They have a nationalized healthcare system. When is the farmers market? Everyday. Where is the farmers market? Everywhere. There are fresh food vendors just about everywhere you look. In the U.S. we have city parks that are decorative urban accents of green. In Lucknow, they built one of the biggest parks in Asia. See the video below of Janeshwar Mishra Park.
Economy. The United States is $22 trillion in debt. India has an economy 1/3 our size and the national debt is about 2% of what ours is. Where is all of our money going in the United States? We’re $22 trillion in debt, yet we have schools being closed down, teachers being underpaid, hospitals closing, roads crumbling, healthcare becoming unaffordable, bridges failing inspections, food scarcity, public transit initiatives not getting approval, and I still can’t get a good phone signal in many locations in Iowa City. We’re supposed to have a government (and an economy) of the people, by the people, and for the people, but I’m increasingly feeling that our nation’s wealth is being siphoned away by a few dozen people who have better ‘access’ to our government and are given handouts and bailouts that the rest of us don’t get – like the ability to write-off the cost of a private jet. Imagine walking down the street and before someone robs you, they help you apply for a bunch of credit cards, then they help you take out cash advances on all those credit cards, then they rob you. That’s our situation in the United States. We have all this debt but not much to show for it. The people robbing us have helped us take out a huge cash advance prior to robbing us. Hopefully, this trend can change soon.
Wellness
This past month I had some good progress with various wellness goals. I reported last month that I’m working on developing the mindset needed for optimal wellness:
“The most impactful wellness practice is the most elusive one. It’s not in a pill. It’s not in a gym. It’s a mindset or a zone one needs to get their attitude focused on.”
I’ve been developing a system of incremental fasting (this is different from intermittent fasting). Incremental fasting involves always fasting from several things in parallel. Building layers of fasting conditions a person to develop greater discipline and self-control. We all fast about 8 hours a day while we sleep. Carrying a fast into the day can be done in ‘layers’ by starting with only water, then a few hours later having a light broth, then adding veggies, and then adding heavier low-carb foods later in the day. The outcome of this eating plan is to reduce calorie intake, but also reduce reactive insulin spikes that cause the body to store fat. Sugar and carbs are powerful appetite activators, so by removing those the appetite is suppressed making fasting easier. I’m now about 23 pounds down from my highest weight. With focus, I will hopefully continue having progress.
Monthly Emails
I’ve been using Yahoo Groups for about 20 years as a system for sending out monthly newsletters. It’s worked okay in the past, but recently their system hasn’t been consistently functioning properly. So, in 2019 I’m switching all my mailings over to Mail Chimp. To signup to receive my monthly email, please click here.
The monthly emails are important because they offer a less intensive subscription for people who don’t want to receive updates every time I post something to my website. One email a month is more manageable for most people.
Thanks!
Many thanks to all of you who keep in touch and provide support for the work I do.
Want More News? For additional news and updates, you can click here to subscribe to the Resources For Life Newsletter.
Origins. For those of you who are new to these monthly personal updates, they began about 19 years ago out of a desire to share from my personal life about topics of lifeways (faith), health, career, finances, relationships, effective living, and activism. This is based on the life map presented on the Resources For Life website.
Greetings! I hope you’re doing well. Thanks for taking a moment to read this month’s update.
Wellness
This past month I’ve been focusing on adjusting my wellness program. For several months I tried lifting heavier weights and doing more repetitions. I started noticing some micro-injuries, so I’ve cut back slightly on the intensity of my strength training by reducing reps and take some days of rest. The days of rest seem to give the muscle sufficient time to rebuild. There are no more micro-injuries.
The most impactful wellness practice is the most elusive one. It’s not in a pill. It’s not in a gym. It’s a mindset or a zone one needs to get their attitude focused on. I’ve been working on intermittent fasting and the mindset required for that. I’m combining intermittent fasting with reduced carb and reduced calories. One of my sources for creating a wellness plan is the Dr. Berg Healthy Keto approach which results in the body reprogramming its physiology to run on fat for energy rather than sugar and carbs for energy. Once this transformation takes place, then it is much easier to go for extended periods (20 hours per day) without food and eat within a 4-hour window from 1PM to 5PM. It’s not a restrictive diet. The body still has the same amount of nutrition and energy to draw on, but it’s much more efficient — like a race car compared to a lawn mower.
According to a talk by Dr. Sarah Hallberg, our typical American eating and lifestyle habits are creating a massive health epidemic and the medical guidelines and practices are sometimes making the problem worse.
This week Fed Chair Jerome Powell:
“The single biggest thing that drives our fiscal unsustainability is healthcare delivery. We deliver healthcare outcomes that are pretty average for a well-off country but we spend 17% of GDP doing it. Everyone else spends on average 10% of GDP. That’s way more than a trillion dollars every year that we spend delivering healthcare. … It’s not that the benefits themselves are too generous, it’s that we deliver them in highly inefficient ways.” (Source)
We’re spending more and we’re getting sicker. Not only is the system inefficient in delivery, it’s often counterproductive — as explained by Dr. Hallberg.
Monthly Emails
I’ve been using Yahoo Groups for about 20 years as a system for sending out monthly newsletters. It’s worked okay, but recently their system hasn’t been consistently functioning properly. So, in 2019 I’m switching all my mailings over to Mail Chimp. To signup to receive my monthly email, please click here.
The monthly emails are important because they offer a less intensive subscription for people who don’t want to receive updates every time I post something to my website. One email a month is more manageable.
Thanks!
Many thanks to all of you who keep in touch and provide support for the work I do.
Want More News? For additional news and updates you can click here to subscribe to the Resources For Life Newsletter.
Origins. For those of you who are new to these monthly personal updates, they began about 19 years ago out of a desire to share from my personal life about topics of lifeways (faith), health, career, finances, relationships, effective living, and activism. This is based on the life map presented on the Resources For Life website.
Greetings! I hope you’re doing well. Thanks for taking a moment to read this month’s update.
Monthly emails
I’ve been using Yahoo Groups for about 20 years as a system for sending out monthly newsletters. It’s worked okay, but recently their system hasn’t been consistently functioning properly. So, in 2019 I’m switching all my mailings over to Mail Chimp. To signup to receive my monthly email, please click here.
The monthly emails are important because they offer a less intensive subscription for people who don’t want to receive updates every time I post something to my website. One email a month is more manageable.
Espresso Machine Video
As I mentioned in last month’s news update, I’m returning to making more videos for YouTube. One of the videos I made recently that’s had just over 200 views so far is a product review and usage video for the Breville Barista Express Espresso Machine. I’ve shared the video on the Resources for Life website as well as directly to YouTube.
When sharing videos it’s good to get them on YouTube but also share them in other places like a blog, Twitter, or other site so people can find them more easily. On YouTube there can be some interesting comments, feedback, and discussion.
As I get back into making videos, my hope is that I’ll become better in my presentation and in the video production process over time.
THANKS
Many thanks to all of you who keep in touch and provide support for the work I do.
Want More News? For additional news and updates you can click here to subscribe to the Resources For Life Newsletter.
Origins. For those of you who are new to these monthly personal updates, they began about 19 years ago out of a desire to share from my personal life about topics of lifeways (faith), health, career, finances, relationships, effective living, and activism. This is based on the life map presented on the Resources For Life website.
I hope you’re doing well. Thanks for taking a moment to read my December update.
SOCIAL MEDIA
As humans, there are many ways we reach out to have a voice in the world, to be heard, to be understood, to find connection. Social media makes that more possible. Whether art, music, writing, or some other form of expression, people are eager to have their message reach an interested audience. I was visiting with someone this past week who told me they go every week to perform their music on open mic night at a local club in town. I think that’s a similar effort to be heard.
In the past, I would use Facebook to post links to my content and that of others. My use of Facebook is diminishing because for me its effectiveness is diminishing. In the past, a post to Facebook would almost always get 5-10 likes. Now it’s rare to get a single like. I think this is because fewer people are using Facebook, and they are using it less often. Also, Facebook knows that in the past I’ve ‘boosted’ posts and paid for advertising. So, they are less likely to give me something for free that I’ve been willing to pay for. So, all my friends who I brought to the Facebook platform over the years, who I could communicate for free with in the past, are now only accessible to me if I pay Facebook to ‘rent’ temporary access to their feed. The more I pay, the more I have access to communicate with friends and family.
Postal Mail
I’ve tried using services like Mail Chimp to reach people. The delivery reports indicate about 10-20% success at reaching people, which is considered much better that average according to Mail Chimp.
Sending emails directly to individuals rather than groups can have better results, but often doesn’t generate a response from people. When I first started using email, it was a novelty. People were excited to get an email back then. Today people are overwhelmed with the flood of email and poorly equipped to handle it without a full-time staff.
I’ve recently returned to sending out handwritten cards and letters to communicate with people. This week I sent out 2019 calendars to friends, family, and some clients from this past year. I’ve already heard back from people by text message, email, and in-person who thanked me for the calendars.
With handwritten cards and letters I’m more assured that they will get read. They are today a novelty and something special in the same way that email had been 25 years ago. I have been drawing and painting digitally on my iPad using the Apple Pencil as a paint brush. The ‘Sketches’ app that I use reproduces the experience of painting even making accurate watercolor splats with random accuracy. I can print unique and personalized postcards with these paintings or with some of my photography.
Videos
About 12 years ago I started sharing videos on YouTube. Some of the older videos now have over 100,000 views each. A recent video about our vacuum cleaner has had over 3,000 views with plenty of positive comments and appreciative feedback. So posting videos to YouTube seems like a much more effective way to reach people. Facebook by comparison produces very little in return. Posts on Facebook quickly ‘evaporate’ before people see them. With YouTube, I don’t need to pay to reach an audience. You can view my videos and subscribe here YouTube.com/resourcesforlife
Personal weBsite
My personal website hosted with WordPress.com has become the most effective way to give people an organized, simple, and easy to navigate portal to everything I’d like to share — photos, music, art, writings, and more — all in one place.
Thanks
Many thanks to all of you who keep in touch and provide support for the work I do.
Origins. For those of you who are new to these monthly personal updates, they began about 18 years ago out of a desire to share from my personal life about topics of lifeways (faith), health, career, finances, relationships, effective living, and activism. This is based on the life map presented on the Resources For Life website.
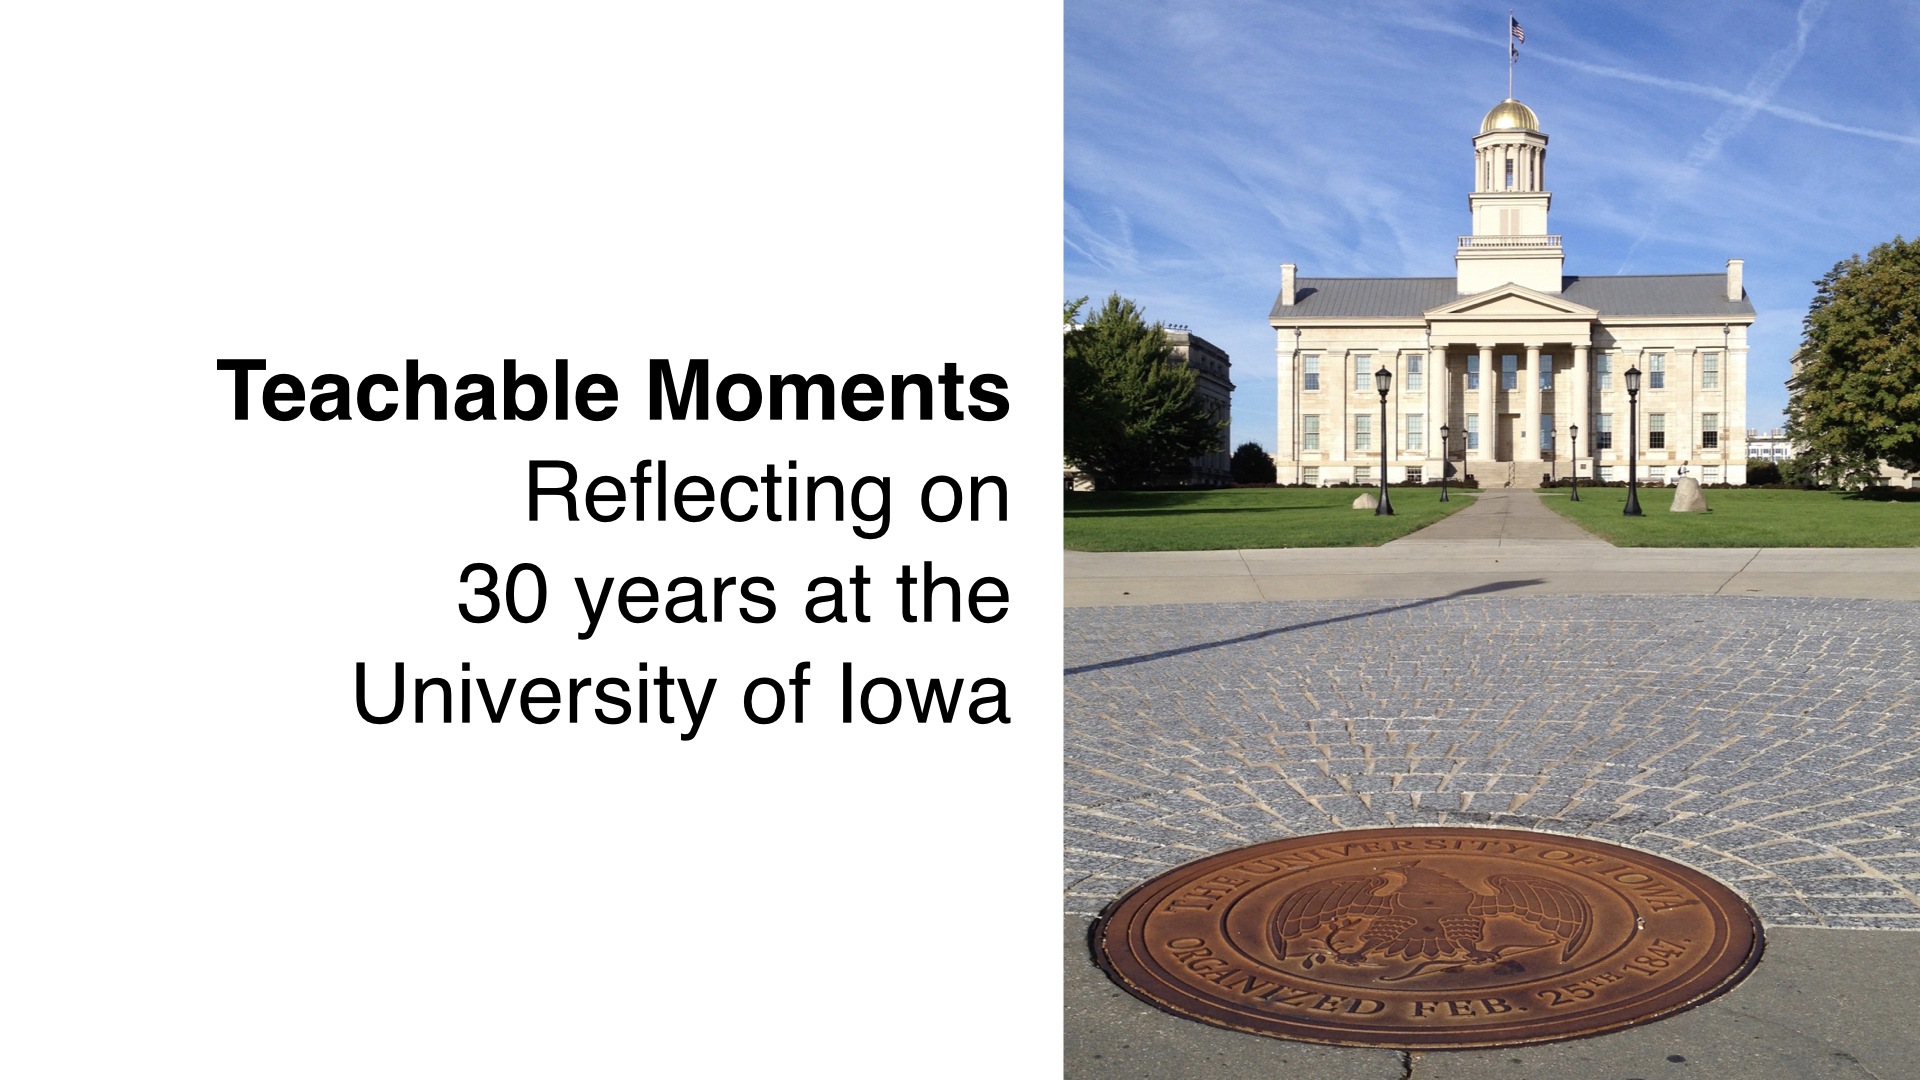
Three years ago, on 16 December 2015, I made one of the toughest decisions of my life: I chose to resign from my career at the University of Iowa after decades of service. I decided to grow my own consulting business to become my primary source of income.
At the time, I didn’t say much about my decision to leave. Unfortunately, some changes in management resulted in the work becoming really unbearable, and I didn’t want to speak negatively of the University or any staff members at that time. As someone who writes regularly and transparently about my life experiences, my silence left some people wondering about the reasons for my departure.
I’m writing now to share some context and reflection as I look back on my work at the University. There were some valuable teachable moments that are worth sharing.
While my time at the University spanned over 30 years, those were not contiguous years of service. I’d spent time abroad as an undergrad and did other work after graduating. My cumulative service at the University was just over 20 years of employment.
This article is primarily about my employment and work-life at the University. In the future, I plan to write more about campus life as a student. My personal website serves as a kind of memoir written in real-time going forward and also sharing stories from the past. So, this article is part of a series of writings with that goal in mind.
My First University Job
My first tech support job at the University of Iowa was as an undergrad working in a language lab computer cluster on campus. That job became an important part of my education. For me it was like a paid 4-year internship that gave me practical experience and skills I’d use for years to come. I kept that job until I graduated and it became a springboard for other opportunities.
There were a lot of inspiring academic experiences to be discovered on campus. I won’t mention them all here. I’ll reserve that for another missive, but one experience really stands out.
As an undergrad, I was grateful to have been able to take an interdisciplinary course with three professors teaching a group of 12 students. David Baldus (a law professor), Dr. John MacQueen (a medical doctor), and Alan Nagel (the head of the English Department at the time). We focused on “Hard Cases in English Literature” discussing historic ethical and legal challenges raised in classic literature. Having a 4:1 student to teacher ratio, made the class more personable compared to a lecture hall with a 500:1 student-teacher ratio.
After graduating, I moved away briefly for my first job as a non-student and spent several years working in San Francisco and then in the Washington D.C. area for a retail electronics and computer company. A few years later I returned to Iowa City.
College of Law
I was fortunate to be available in the early 1990s when an opportunity came up to work at the College of Law installing and then supporting the computer network and user community there. After 18 months, I was ‘scouted’ by what is now called ITS – the central campus IT services group who offered me a raise to join a network services team.
The College of Law eventually hired 5 people to provide the services I’d been offering. It made me feel good to know that I was delivering a significant value to the college. I’d been providing instantaneous support by using a voice pager messaging system before cellular phones were readily available. It was the same system being used by doctors at the time. I had a mobile services cart with all the tools and software needed to perform hardware and software support throughout the building. Eventually I had a 7-pound cellular phone that I put on the cart to make sure people could easily contact me with. Most support calls could be resolved in minutes over the phone which saved time and reduced frustrations.
Donating to the University
At the College of Law, the paging system I was using, the cell phone, the tools, software, and even my own office computer and peripherals were all purchased with my own personal funds. This saved the college thousands of dollars, and allowed me to work with some fun technology that otherwise would not have been available due to limited funding. I purchased one of the first external writeable CD drives for about $1,200 and a scanner for about the same amount.
I know my contributions don’t seem exceptional or significant when compared to the multi-million dollar donations made by those who have buildings named after them, but to me they seemed like something meaningful I could contribute.
I continued this practice of paying for all my supplies, services, and equipment over a span of 30 years, and even paying for some supplies and equipment to help others. From grad students on a budget to departments with limited funding, I offered cables, adapters, computer parts, printing services, all for no charge. Having instant ‘pre-approved’ access to any tools I needed to get my work done really helped create an efficiency in my workflow. I could just walk to the store, and in 5 minutes be back with whatever cable, adapter, or power cord was needed to get the job done. It supported my goal of instantaneous problem solving.
I was able to cover these costs with the additional income I had from my outside consulting business. I remember at one point, I was working a regular weekend gig that provided more income in a weekend than I earned all week at the University. Although the University didn’t pay as well as private companies and direct consulting clients, the benefits were good and the workplace culture was positive. This is how academic institutions have traditionally been able to attract and retain talented people willing to work for little less.
UIHC Consulting
I spent some time in the mid-1990s providing tech support to a department in the University of Iowa Hospitals and Clinics. It was nice to be working for the University but getting paid as an independent contractor doing freelance work. I had a considerable amount of freedom to work on the projects assigned and I reported directly to the departmental administrator as well as to several doctors I was working with. That work paid well because there were not several layers of administration taking a cut of the budget between me and the department. I continued doing consulting and freelance work through 2001.
Language Media Center
In the late 1990s and into the year 2000, I was happy doing consulting work full-time, and probably would have continued, but one day I saw an ad for a job at the University working in the same language lab that I worked at as an undergrad. It prompted me to contact my old supervisor from 20 years prior. We had a good conversation reminiscing, and then she asked if I was calling about the job. I’d actually just called to visit, but the job did sound interesting and I decided to interview for the position. So, in the summer of 2001, I was back working at my old job, this time as a staff person rather than a student.
The Language Media Center was a really great place to be working given the experience and diversity of skills I’d developed over many years. I was able to flourish in the tech-side of multimedia while also supporting computers and people with a variety of support needs and abilities.
It was that ideal situation you hear about – where a person is paid to do what they enjoy. As a result, I’d spend 50 or 60 hours a week working at the LMC. There was always some project to work on or someone needing support. Back then we had extended hours and were open into the evenings and on weekends. People appreciated having some after-hours support, especially for evening events that took place in the building.
My supervisor was exceptional and knew how to equip, empower, and inspire people to achieve their best work. She hired smart, hard working, high caliber people, and then gave them the tools, training, and support they needed.
When the proper conditions are created, employees thrive. They go above and beyond what’s required or expected. That’s the context I was working in. It was really the best job and work environment I’d ever experienced. It’s that kind of workplace culture that encourages people to stay.
Wanting to give back more the University community, I joined with campus partners and organizations in common projects that served our department and division. This helped me ensure the practices, policies, and standards I was using were consistent with the broader IT community on campus. Sometimes tech people want to ‘do their own thing’ but I believed that standards were important for continuity and efficiency.
Flying Without Instrumentation
Robust organizations are data-driven and outcome-focused. Stakeholders are involved in decision making. Producers and consumers are partners in the governance process. Transparency is valued. Projects are collaborative. Teams and individuals cooperate. This is the kind of environment typically fostered in higher education institutions and successful businesses. As mentioned previously, this is the kind of workplace culture that attracts and retains talented hard working people.
Departments at the University are peer reviewed by members of other institutions. These reviews provide valuable insights into how academic units can perform more effectively and be better aligned with the University’s mission. When it came time to have our departmental review, I was eagerly awaiting the report – looking forward to getting some impartial feedback from the committee and suggestions on what we could be doing better.
The report was very positive. The committee concluded our department was providing services essential to the mission of the University. They determined we needed more space, more funding, and more staff. The College ignored the recommendations of the committee. We lost space and lost funding and had no increase in staffing. That was sort of a wake-up call for me. I couldn’t understand how someone could pay for an independent study, then reject the study once it was completed.
I share this story because it was an early indication to me that some aspects of the University’s character and culture were changing. As an employee, it made me feel less secure in my job and less confident about the fate of my department. Rather than acknowledging our contribution as reflected in the report, it seemed we weren’t being valued. Having space taken away from our group, instead of being given more, made our work more difficult.
When higher-level administrators ignore the findings and advice of colleagues from peer institutions, it’s like a pilot flying through a storm refusing to look at the instrumentation. If you’re on that airplane, you’ll feel a bit apprehensive. You might start clutching your life-vest.
It was then that I began to consider how I could make a lateral career move within the University if some high-level administrator on a whim decided to shut down our department.
OBSERVING DOWNSIZING
I’ve been encouraged following the news of states like Tennessee where legislators are increasing the state’s investment in higher education. Programs like Tennessee Promise ensure that everyone capable of achieving an advanced degree can get one. This creates a valuable equity of workforce readiness that results in the state becoming a magnet for top-tier businesses and high paying jobs. Today Tennessee is home to the world’s fastest supercomputer that may find a cure for cancer.
Unfortunately, in Iowa, legislators are less enthusiastic about higher education and public education. Instead of investing more money, they are repeatedly shrinking our education budget by millions of dollars. As a result, academic institutions are looking for ways to cut back, and downsizing is an easy place to start.
I’ll share a few observations about the impact of downsizing.
In advance of an annual physical with my doctor, I’d called the hospital with a question. My call went to voicemail so I left a recorded message. I thought it was odd that nobody was available to answer the call. Several days went by, and I’d had no response to my request. Finally I spoke with a nurse at the hospital, and asked her why there was such a delay in having someone get back to me. She explained that she was the only person responding to calls because they had cut back on staff at the hospital. She said there were hundreds of patient calls she had to respond to. Some high-level administrator thought it would be a good idea to cut back on staffing to save money. As a result, employees were stressed, unhappy, and overworked. Patients were not getting quality care and service. This is an example of how bottom-line thinking and ‘downsizing’ can produce undesirable results.
In the building where I worked on campus from 2001 – 2015, we had a custodial team that would arrive around 4PM and spend the evening cleaning the building, leaving after midnight. Because our lab was open after 5PM, and I would often work in the evenings, I got to know the custodial staff. They were a good group of hard working people. Caring for the building took a lot of work. By 2015, the downsizing trend impacted our custodial team. One evening, I saw one of the custodial staff and asked where everyone else was. He told me they had reduced staffing and now he was the only one cleaning the building – one person doing the work of four or five. He didn’t seem happy about the situation.
It became increasingly common to see office staff working after hours. Requests for additional staffing were denied, and as people left, the vacancies were not filled. Work was shifted to the remaining staff people. So, this resulted in people feeling overworked. It was an easy way to save money: Eliminate a full-time position, and shift the work to existing employees, thus recuperating the payroll costs as savings. It probably made sense on paper, but when implemented didn’t produce good outcomes.
At one point, a department head passed away unexpectedly. This was a sad event for everyone in our building. The College refused to fill that person’s position, so that entire department suffered.
I share these examples of downsizing and bottom-line thinking not as a criticism, but as an observations and ‘teachable moments’ where initiatives designed to create a more lean organization went too far and produced undesirable outcomes.
Under New Management
I’d mention informally to someone that I had concerns about my present career path at the University because our department wasn’t getting the recommended support we needed, and my colleagues would all be retiring in a few years. In the climate of downsizing, and a seeming unwillingness by the part of administrators to be guided by impartial data and stated goals, I thought there was a likelihood my department could be phased out. I’d seen it happen with other departments on campus. I asked this person for some advice about my long-term plans.
They apparently thought I wanted to be immediately transferred into their organization under their management. That was their ‘takeaway’ from our meeting.
So, one day I arrived at work to discover that this person had abruptly transferred me to their organization – without any meetings or prior discussion with my colleagues or my supervisor about the impact on our academic unit. An ambush meeting was arranged with my supervisor who went to the meeting not knowing what it was about. It wasn’t an exploratory or fact finding meeting. A decision was made that impacted me, my colleagues, and my department – all without any input from us or coordinated planning ahead of time. My supervisor was upset with me, thinking that I’d take this action without consulting her first. It was a very poorly executed mess, and my first glimpse of how it would be working with this new manager.
Experiencing Downsizing
An IT person in my building who I think was feeling overworked decided to take a job outside the University. As part of the downsizing trend, I was asked to take on his full-time position while continuing in my old full-time position. I agreed to the arrangement because I’d grown to really enjoy working with everyone in the various departments in our building. I really believe I could apply hard work and innovation to do both jobs in the same way I supported the entire College of Law on my own.
I soon discovered that the job I’d agreed to take had in some respects been neglected for years. I found unapproved network hardware that had been installed years ago. There were new computers and unopened equipment that was supposed to have been delivered to faculty and staff that was just sitting in boxes for many months. The building inventory hadn’t been kept current, so computers assigned to one user would be in someone else’s office. There were computers in the building that were listed as being elsewhere on campus. It would take two or three people working full time to get the mess cleaned up.
I didn’t blame the person who I was replacing. It was clear to me that he had inherited much of the disorganization I found, and he was too overworked to improve the situation. I’d been in the building for almost 15 years and knew that many of these problems pre-dated his time working there.
Initially I tried applying herculean efforts to bring order to the situation, but I was being given greater responsibilities and duties across campus by my new manager. One service I was responsible for was used by thousands of undergrad students and their instructors so it was essential to make that a priority. It was beginning to look like it wouldn’t be humanly possible to get everything done even with working evenings and weekends.
A Master Class in Poor Management
Over several months in working with this new supervisor, I felt like I was taking a Master Class in what it means to be a poor manager. It was one of the worst experiences I’ve had in my life. I’m purposefully omitting their name. For purposes of this story it doesn’t really matter who they were. What’s significant is the example of how poor management can cause businesses and institutions to lose some of their best people.
One of the first directives I was given by my new manager was to not respond promptly to support requests because this would establish the expectation that support could always be provided promptly. For the same reason, I was told not to answer emails after hours or on weekends. I was also told not to use my mobile phone, but instead to have people leave voicemail messages on my office phone – which would almost always be the case if I was out doing my job helping people in the building. Using the mobile phone had helped me answer simple support questions in real-time and avoid having support requests pile up.
These new directives would result in a substantial inefficiency in service delivery making my job almost impossible. There’s a misconception that providing exceptional and prompt service comes at a great cost. The fact is that prompt support benefits everyone and involves less work. Delays create inefficiency and frustration. Simple problems escalate into worse problems.
Another request was that I not help people with their personal computers and devices. That’s something that all of us had been doing in my department. We were a tech support center. We were tasked with providing user support for the various services and programs offered by the University. It was common for faculty and students to use their own devices for their academic work. If faculty members would take their computers to Best Buy or some other outside support provider, they could inadvertently compromise student data to snooping which is a potential violation of laws regulating privacy of student records (FERPA). If they had any health information on their computers, a data breach could violate HIPAA regulations. For example, an email from a student sharing healthcare information related to a request for accommodations.
On one occasion I requested time off for a doctor appointment. The supervisor asked me how much vacation time I’d be using for that doctor appointment. I explained that I planned to use sick leave for the doctor appointment – based on the prep and recovery instructions provided to me by the doctor. The supervisor said I would need to use vacation time rather than sick leave time for some of my time off. I had hundreds of hours of sick leave accumulated because I’d rarely taken time off work due to sickness. I typically worked even on occasions when didn’t feel great. So, to be told to use vacation time for health related time off was hard to understand. The supervisor defended their position by telling me that they had a similar procedure and didn’t need much time off. It was just bazaar.
In one meeting with some campus partners, the supervisor went off topic and criticized me for including my job title and support areas in my email signature. This was a common format used by everyone on campus, but for some reason the supervisor didn’t want others knowing the scope of my support responsibilities. The others in the room looked on with bewilderment. I explained that even if I didn’t have that information in my emails, it was posted on the main ITS website listing me as a contact for various campus services.
When I had my first performance review with this new supervisor, I received a good review, but it was clear to me from what was said that the supervisor had not contacted any of the primary administrators I worked with on a daily basis. After investigating this further, I found that the supervisor basically created my review out of thin air. Those who should have been consulted were upset to learn the review was completed without their input. I was upset as well because I’d worked on some important initiatives that I wasn’t getting credit for.
The few examples I’ve given here are mild and just the tip of the iceberg. It became clear to me that work-life under this new supervisor would be very unpleasant. I’d been an award winning member of the University community and I wanted to leave with the positive reputation I’d earned over three decades of hard work.
I share this experience because it was an important part of my experience at the University. I think it’s important to reflect on what conditions cause dedicated and talented people to leave.
I’ve had people ask me, “Why didn’t you do something about the situation?” Unfortunately, larger institutions and businesses often don’t have mechanisms in place for addressing and correcting problems with mid-level managers. If procedures exist, they are often ineffective. Employees are typically worried about retaliation, and rightfully so. A soured relationship with a supervisor can make work-life miserable, and result in a negative recommendation later – making getting another job difficult. So, most employees, even if they are dissatisfied just won’t say anything. Processes for grievances and whistle-blowing are intended to be confidential. If complaints quickly result in the supervisor being informed about what was said and who complained, then employees are even more reluctant to offer honest feedback about concerns. In this situation, because of IT support unification, had I moved to another department, I would have still been reporting to the same person. So, the only form of protest I had was to leave. Others had already left out of frustration, and I hoped that with more resignations eventually the exodus would bring attention to this person’s management shortcomings.
AN UNEXPECTED OPPORTUNITY
In November of 2015, Tristan Walker, the founder and CEO of Bevel, reached out with an offer to hire me. He had seen some of my writing and marketing work online. He and his team liked what I’d written about the company and products. The work with Bevel would be part-time marketing that could be done from my home in Iowa City. It was a perfect complement to my consulting work. So, I accepted the offer. At the time it also provided a positive explanation for leaving the University without having to speak about some other reasons I wanted to leave. The work with Bevel was rewarding. I still use their products. This month Bevel was acquired by Proctor & Gamble. It was enjoyable to be with the company fairly early on to see it grow.
The Decision to Leave
I decided if I was going to leave the University, I wanted to provide a full two-week notice. So, on 16 December 2015 I provided my resignation for December 31, knowing that it would provide a full month before classes would start again in mid January. In addition, I offered to come back and volunteer with my department to provide any additional training to team members there. Despite these efforts, my supervisor was critical of the timing saying I didn’t give them enough time to find a replacement.
I had one final meeting with the supervisor to complete the standard paperwork for off-boarding. Then unexpectedly the supervisor asked me to hand over a computer that had been assigned to me about 12 years prior. At first I didn’t even know what they were talking about. Then I recalled an old Windows computer that would have been sent to surplus years ago, but how would I prove that? I really didn’t want my University record to indicate there was an unaccounted for computer.
Fortunately my colleague kept impeccable records of all equipment sent to surplus, including dates, models, and serial numbers. She produced the record in minutes. The supervisor seemed surprised and a bit disappointed. It seemed to me it was an effort to get me in trouble. Then the supervisor asked about some other computers. They were all accounted for as well. They weren’t even computers assigned to me.
I found out later that I was supposed to be given a survey in which I would provide among other things feedback about my supervisor. That paperwork was not provided.
These departing experiences were a confirmation to me that I was doing the right thing and getting out just in time. It was a good feeling to finally have closure.
Volunteering
In December 2015, I made arrangements with my department to train my replacement and other staff members after my last day in order to ensure I’d have the time and focus to provide adequate training.
So, I returned in January 2016 to volunteer with the Language Media Center, and those days of working with the department uninterrupted were really enjoyable. I felt bad about leaving and it was an opportunity to give something back and show appreciation for the many good years of working together.
UIOWA Apple Repair Center
In the summer of 2016 there was a half-time position open at the Apple computer repair center on campus in the Iowa Memorial Union. It would involve working with someone I’d known for many years and respected highly. So, I applied for the job and was hired. Before repairing any computers, I went through the official Apple training program to become an authorized repair technician.
I really enjoyed working at the repair center. There were no meetings to attend. Nobody was calling on the phone. I had no emails to answer other than a few customer questions. It was restful and rewarding work. I could just focus on repairing computers. We were providing convenience and value that people really seemed to appreciate.
I learned a lot from the manager of the repair center. Not only about Apple repairs, but also about exceptionalism in management and operations. He taught by example.
I continued working at the IMU into the fall semester, but the demands of my growing consulting business made it impractical to continue working there.
Conclusion
Overall, my experience at the University of Iowa was positive, both as a student, and as an employee across multiple campus centers and departments. So, I’d highly recommend UIOWA for anyone considering an education or career there.
I promised at the outset of this writing that there would be teachable moments, and there really have been. Over the years I’ve learned that exceptional managers can make a world of difference. A rewarding work-life can change a person’s life. I’ve had many excellent managers over the years, and I can reflect now with greater gratitude for each of them.
I’m grateful to have been inspired and empowered through my time at the University. At a young age, I not only learned important skills, but the importance of service to the world around me.
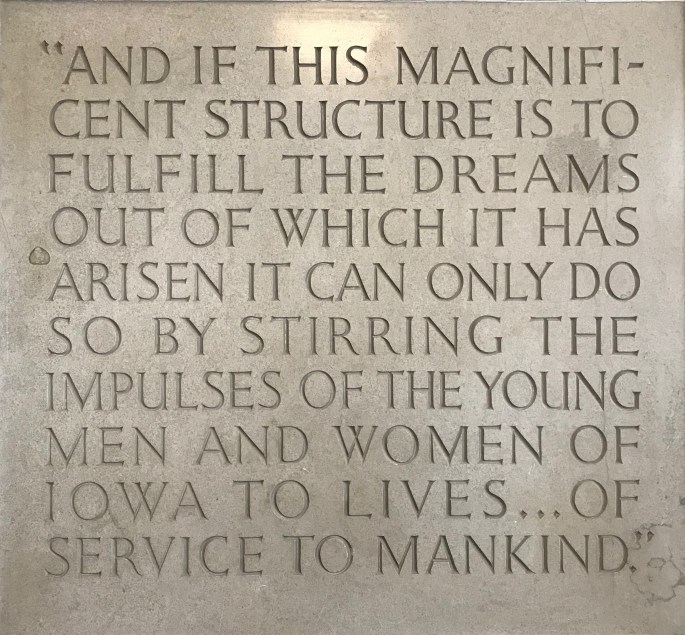
I’ll close with a quote that’s engraved in the entryway of the Iowa Memorial Union that I think describes the impact of higher education for many people. It’s consistent with my experience as a student and later as a staff person on campus – being inspired by the UIOWA community to live a life of service.
“If this magnificent structure is to fulfill the dreams out of which it has arisen, it can only do so by stirring the impulses of the young men and women of Iowa to lives of service to mankind.”
~ James Weaver, 1926
Your Feedback is Appreciated
As a writer, I strive to make sure that my writing is fair, accurate, and helpful. If you have any feedback or comments, please share them below and I’ll incorporate any suggestions or corrections in the article. Thanks!